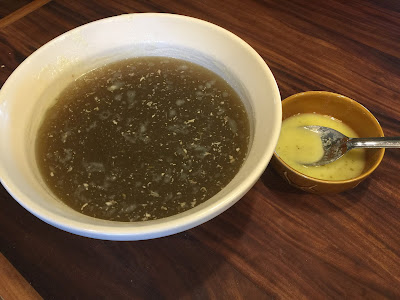
Easy Homemade Chicken Stock

How to make chicken stock
Chicken noodle soup, chicken and dumplings, chicken pot pie: these are just a few things I use my homemade chicken stock in. 

Making your own stalk is easier than you think, it’s healthier, bolder and making your own saves you a little in the pocket book. I usually make a big batch in the fall and freeze for the coming colder weather. Whenever, I have a recipe that calls for chicken stalk, I defrost and use.

What You'll Need:

5 lbs. Chicken Leg Quarters
3 Large Yellow Onions (unpeeled & quartered)
6 Carrots (unpeeled & halved)
4 Celery Stalks (with leaves, cut into thirds
1 Large Head of Garlic (unpeeled cut in half crossways)
2 T. Kosher Salt
2 t. Black Whole Peppercorns
8 Quarts of Water
2 T. Parsley Flakes
1 T. Thyme Leaves
2 t. Dill Weed Ground

Directions:


Put parsley, thyme and dill weed into cheese cloth and tie.
How to make chicken stock


In a 16 to 20 oz. stock pot add all ingredients, including cheese cloth and simmer uncovered for four hours.
How to make chicken stock

Strain the entire contents of the pot through a colander and discard the solids. Chill the stock overnight. The next day, remove the surface fat. Use immediately or pack into containers and freeze for up to three months.
How to make chicken stock

Makes 8 Quarts

The Queen Bee Says: "The secret to contentment is to know how to enjoy what you have."


Comments

Popular posts from this blog

Back to Basics with Buttermilk Cheddar Biscuits

Spring has sprung on the farm. The trees and flowers have awoke from their winter sleep with beautiful blooms. Hummingbirds have arrived to feed on my feeders and the noise coming from the trees is a wonderful melody of bird song. We were recently enchanted with a very special visit from my granddaughter, Hadlee Rose Mount. The sacred bond between a grandmother and her granddaughter is a sweet whisper of love from the depths of our souls.  During Hadlee Rose's stay, we planted a lovely Queen Elizabeth Rose Bush, right outside my bedroom window. Even though we are often separated by many miles, I hear her love whisper each time I gaze upon our rose bush and I whisper back, "I love you sweet Hadlee Rose." In keeping with the simple, basic living ideas of the Morgan Family Farm, I've chose my go to homemade Buttermilk Cheddar Biscuits recipe for todays blog. Let's get started. What You'll Need: 2 Cups all-purpose flour (plus more as ne...

How to Make Sand Plum Jelly

Wild Sand Plums & Friends When it’s a hundred plus degrees outside, in the late summer of Oklahoma, sand plums are best picked with friends. My sweet friend and I didn’t even notice the heat, as we talked about life and picked sand plums, one afternoon in August. Sand plums known commonly as Chickasaw plum, Cherokee plum, Florida sand plum, sand hill plum, or sand plum, is a North American species of plum-bearing tree. The back corner of The Morgan Farm has a wild sand plum thicket that were ripe for the picking. Making the Juice There are two parts to making sand plum jelly. Part one is turning the plums into a juice. You can freeze the juice until your ready to make jelly. Here are the steps: First, wash the plums with cold water, making sure to cover the plums completely with water. Add them to your pot. Boil on high temp until plums are soft and the skins pop. The water mixture will turn a red color when they are re...

Blueberry Scones

Scones f or the Queen Duchess of Bedford is thought to have begun the British ritual of an afternoon snack, sometime in the early 1840s. The Duchess was tired of feeling famished in the middle of the afternoon and thought a little snack, with tea, would be just the thing. The tradition of eating a light meal with company in the middle of the day became firmly entrenched in British national life. During the early years of Queen Victoria’s reign, the United Kingdom was desperate for rituals of comfort and domesticity. Afternoon tea and scones were just what they needed. How to Prepare Blueberry Scones I always premeasure all need ingredients before getting started. Timing is crucial, especially when baking, so it's much more efficient if you measure ahead of time. It saves you from stopping during the process to measure. So, the first thing I did was premeasure all ingredients. To get started, I preheated my oven to 400 degrees F. and lined a large baking pan wit...